Monday, April 20, 2009

Pins, Blankets, and Invitations

I've been super busy in the past week! I'm working in invitations for my wedding, and I have three (yes, three) baby blankets to finish in the next week. Also, I made a whole bunch of new pin sets for my fabric shop.

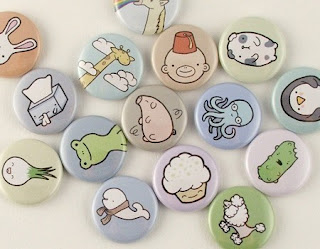
Pins in the process of being made - felt backs (ecofelt from recycled plastic) are cut and ready to have pins attached.

Finished fabric pins! They come in a set of three -- small, medium, and large -- in a round tin. I hope to have them posted some time this week.


Check out my handmade wedding blog for a post about my wedding invitations.

Also -- I'm going to have to push back the spring line for my jewelry store a week because I haven't had time to take photos. I'm hoping to start uploading by this weekend.

Friday, April 10, 2009

Sneek Peak - Spring Jewelry Line

Mmm, Chocolate and pink, one of my favorite color combos.

Vintage lucite chocolate drops with pink glass ruffles.

Lovely white enamel chain with pink and chocolate handmade ribbon beads.

Bangle with patterned paper, inside painted to match -- shiny glaze applied on top of paper, which I love!

Tuesday, April 7, 2009

Sneak Peak - Spring Jewelry Line

More Sneak Peaks!!

More of the chunky white enamel chain, this time in a classic black and white combo. Not exactly springy, but I think black and white works year-round!

Sweet peach-pink flowers on handmade hammered sterling silver earwires. I might also have these with another color flower -- I do love this soft shade of pink though!

Monday, April 6, 2009

Sneak Peak - Spring Jewelry Line

I am completely smitten by this chunky white chain! It is just an interesting shape, with white enamel finish -- Paired with handmade ribbon covered beads in aqua.


Faceted silver-tone glass beads (lucky 7!) on handmade (by me!) large hoops. Perfect for any season, not just spring!


Stop by the shop now for a great sale and come back on April 18th for the launch of my spring line!

Sunday, April 5, 2009

Where have I been, you ask?

I've been quite a busy bee, which is why I had to abandon my blog (and my fabric shop) for a while. The wedding planning crept up on me, and I have been up at night worrying about details. There is still a lot to plan, but we have gotten some big things (candy buffet, photographer, etc.) out of the way, so I'm feeling a tiny bit better with the plans right now. My biggest problem is that obviously I can't be the one to set up the centerpieces/candy buffet/guest book/table numbers/name cards on my wedding day and that is totally freaking me out. I need to hire someone super insanely organized to do that for me. Any takers??

Also, I have been working on a new spring line for my jewelry shop. While I haven't added anything for a really, really long time, I decided that I really needed to put my heart back into it. My new designs will include handmade earwires (I am so excited about being able to make my own!), sterling silver chain, and some designs with paper. My paper shop has been closed for a while, but I am still madly in love with paper -- so I found some new ways to incorporate paper into some jewelry. The predominate colors in the spring designs will be, well, springy! Pale pinks, greens, yellows, and purples. There will also be hints of deep brown, like the rich soil that the flowers are popping up out of right now.

I'll be showing some sneak peaks in the coming days. I hope to have the line launch on April 18th.

Since I'll be debuting new designs, check out the 50% off sale to clear some items out of my shop!

Saturday, February 28, 2009

I promise I didn't disappear...

I was just really really really insanely busy this week. Last weekend I worked on samples for my wedding invitations (I think we are going with version 2, I'll be sure to post photos soon). This week was a bit crazy with school, I joined the gym and started working out again, and I had tons of orders to get out. I hope to be back on schedule with more posts tomorrow, I hope... but after a day in Cincinnati at some of my favorite shops, I need to get some sleep!

Giveaway Winner!

And the winner of a custom wall monogram is...

Cora Anne!! Congrats! I'll be getting in touch to get your address and confirm your choices!

Saturday, February 21, 2009

Collecting: Brooches

I'm a fairly plain-jane dresser, and I'm thinking I need to add some fun brooches to my wardrobe to brighten things up. Here are come I'd love to collect:

Love the combination of free-hand stitching and the buttons.
Natural Beauty Brooch by Paperfish

Gorgeous! A little piece of 3-D art.
Wool felt flower and pearl brooch/pin in winter blue and white by Minmade

Very textural, I love the mix of stitches and beads.
Cloud Brooch by handmadepretties

Okay, so it's a hair clip, not a brooch -- but I wish it was!
Robin's Egg Blue Monogram Baby Hair Clip by Details Studio

Layers and layers of felt!
Fabric and Felt Flower Brooch by Jen Menkhaus

I love how this looks like a ribbon you would win at the fair.
Red and Pink Poppy Brooch Ribbon for a Special Valentine by Poppy and Clover

I come back to this brooch again and again, I just adore it!
Come Fly With Me - Fabric Brooch by Rubyjo

Thursday, February 19, 2009

Organizing: Jewelry

I have too much jewelry to fit in your standard sized jewelry box. I also find that I wear my jewelry more if it is in view and easily accessible.

I store bracelets, necklaces with thin chains, and earrings in small white ceramic bowls. I actually have these bowls in a shallow drawer in my vanity most of the time, but I put them in this fabric tray to show how you could display them on top of a dresser. I group the items together by color or style -- this makes it easier to grab pieces that work well together when I am getting ready in the morning.

For bulkier necklaces, I use this tree from Ikea for display and storage. It is usually out on my vanity counter top. When the necklaces are in view all the time, I am more likely to wear them!

And now for some quick Etsy-love! This merry-go-round necklace is from Make Pie Not War. The gold earrings in the back are from the pebble collection. The bracelet is vintage -- I love the chipping on the enameled leaves, I think it gives it charm!

More Etsy-love! The feather earrings are my own design. The dime necklace is from sudlow. The patina wing is from Miss Fickle Media. The key is a vintage find!

Wednesday, February 18, 2009

Inspiration Wednesday: Rain

Today it is rainy outside and I love it! Here are some rain-inspired finds:

I love the combination of enamel and clear glass in this necklace.
Rain Cloud Necklace by Dough Lady Designs

Sweet cloud and raindrop mobile -- I adore the use of the grey wool with the scrap fabrics.
Rain Clouds - cloud number 22 by IgFrog

Gorgeous blue clouds in a simple round pendant.
Clouds for a Cause - Antique Pendant by Finestra


A collage of clouds and raindrops.
Clouds Collection 03 by KupKup


These clouds will cheer up a rainy day!
Happy Clouds Framed Print by Donnie Wrights

Don't you wish you could float above the clouds too?
Over the rainy clouds -print by Carambatack Designs


A unique wool cloud and raindrop brooch.
Spring Showers Felt Pin by Maisey Handmade

Tuesday, February 17, 2009

Tool Tuesday: Candle Lighter

I know what you are thinking. "Jamieson, that is NOT a crafting tool. That is a candle lighter." (A Bic Luminere Candle Lighter, to be exact.)

I'm going to have to disagree with you though. It is most certainly a craft tool, at least in my craft studio. I should begin by mentioning my extreme fear of matches. I can't light them. Never could. I've tried, both the book and box kind -- I am just no good at lighting matches. Which is probably because I think that you should never have a flame that close to your hand. I mean, seriously, who thought that a teeny tiny less-than-two-inch match was a good idea?

Which brings me to another fear. I am not really a fan of fire. I was a girl scout, for many years in fact. However, I never came to love the whole campfire thing. Just not my cup of tea.

That being said, this candle lighter is one of my favorite tools. Partly because it keeps the flame far, far away from my fingers.

But the main reason I love this candle lighter is because I looooooove ribbon. Its a mild obsession. Please see exhibits A, B, and C below for further proof.


Exhibit A: Ribbon organized on Ribbon Ring Tags. I found these nifty organizers after reading LollyChop's review on her blog. The ribbons are organized by color, of course. At the top you can also see my embroidery floss organized by color on rings.

Exhibit B: More ribbon on white plastic ribbon cards. All of my ribbon used to be on these cards... until I ran out of room and decided to use the ribbon ring tags. Now, I only store plain ribbon or ribbon that I have yards and yards of on these cards. They are organized by color in glass jars on a floating shelf. And clearly, I have a lot of buttons as well.

Exhibit C: The stash of unorganized ribbon in my closet in a box. This ribbon is just begging to be organized, which would be possible if I wasn't out of ribbon ring tags! Some of the plain stuff will going on the ribbon cards too.


So, there you have it. I clearly have a lot of ribbon. Polka dot, striped, gingham, grograin, floral, velvet, mmm... I love it all!!

The thing only thing I dislike about ribbon... is when the ends fray. *Cringe* It is horrible! You start out making this lovely 45 degree cut, or even a fancy V-cut in the end of a wider ribbon... and then the end starts to fray, ruining the whole thing. You can cut the end again, but inevitably it will start fraying again. *Sigh* What's a ribbon-obsessed crafter to do?!?!

This is where the candle lighter comes in. You can use the heat from the flame to seal/melt the end of the ribbon. Most of the ribbon I have works for this nifty trick. Ribbon that is all cotton or another natural material will not work (at least it doesn't work for me) -- so, most of my ribbon is synthetic stuff I guess!

Before we proceed... WARNING: Please read all warnings on the candle lighter you use before you try this nifty trick. Don't allow children to use the lighter and follow any other directions that come with your lighter. Thank you!!!


Hold your ribbon in one hand, with your fingers well away from the end (at least two to three inches. Light the lighter by pulling the trigger/button. Slowly bring the lighter closer to the end of the ribbon. I find that I have more control if I move the lighter, rather than the ribbon.

Bring the lighter near the end of the ribbon, but DO NOT touch the ribbon with the flame. We are trying to melt the end of the ribbon, not set the ribbon on fire!! It will only take a fraction of a second to melt the end of the ribbon, so please watch closely. Once you see it start to melt, move the flame away and release the trigger to turn off the flame. If you hold the flame near the ribbon end too long, it will singe/scorch and turn black. If you aren't happy with the results, cut off the melted end of the ribbon and try again.

Here is the sealed/melted end of the ribbon. Nifty, huh? And much better than messing around with that sticky ribbon sealer gluey-gooey stuff that you find a in a bottle, at least in my opinion. I've never had much luck with it. (By the way: The ducky pin snuck in the picture -- He was so proud of himself for holding the ribbon steady while I took the lighter photos! And, just for future reference, I do not recommend trying to photograph and use a lighter at the same time. Just not a good idea, folks.)

If you have any questions, feel free to ask! Remember, please be safe when trying this trick!

Monday, February 16, 2009

Giveaway: Custom Applique Wall Monogram!

I love these Wall Monograms so much I can hardly stand it!!!

I am giving away a single letter applique wall monogram in a letter of your choice!! I will customize the fabric, thread, hoop frame, and ribbon colors! For more photos, check out the listing in my shop.

To enter, please leave a comment below. In case you win, please also let me know the letter and the colors you would like. I will contact the winner for more details before I begin their custom wall monogram.

I will be using a random number generator to choose the winner on Friday, February 27th at approximately 10pm. Please make sure you include a link to your blog or email when you post so I can get a hold of you if you win!

Good Luck!

Sunday, February 15, 2009

Collecting: Mini Art Buttons Came in the Mail!

Yippee!!! Some of the buttons I ordered came! I love them! The smaller bird buttons are from annarubyking and the larger bird buttons are from Bird Nerd. Now I have to find a way to display them... I'm thinking a shadow box?

Saturday, February 14, 2009

On My Craft Table: Basket Liners and New Thumbtacks

Not too much going on today, finishing up some projects such as these new thumbtacks for the shop:

Also, I am working on some basket liners for a friend:

X-marks the spot! The gingham fabric was making me really dizzy while I was trying to cut it. I made a muslin basket liner first, to make sure it would fit the basket. Then, I made a pattern out of poster board (I wanted something stiff to trace around). I still need to cut out the white lining -- the gingham was fairly sheer, so it needed a lining. Then I will use both the sewing machine and the serger to stitch these guys up!

I'll be working on more on Sunday, so I'll post more photos then!

Friday, February 13, 2009

Giveaway Winner!

And the winner is.... Jessica! I will get in touch with you for your address!

Check back Monday for a new giveaway!

Wednesday, February 11, 2009

New Idea!

I have been working on this idea for a long, long time... and I am pleased as punch that it turned out exactly how I envisioned!

It combines two of my favorite things -- fabric and embroidery! But before I spill the beans... If you are LollyChops... You must slowly back away from this post. Do not read any further! I don't want to ruin the surprised in the mail!


Okay, now that LollyChops has (hopefully) left the blog-room, here is a photo of my new custom applique wall monograms:

Ahh!!! I love them so much! They are so much fun! They look great alone, or in groupings as shown. You can hang the wall monogram by setting the hoop on a hook or nail, or you can tie a ribbon around the screw at the top of the hoop.


The back of each wall monogram is finished with a coordinating ribbon to cover the edges of the fabric. The hoop frame is hand painted in a coordinating color. I also covered the back of the fabric with white felt to protect the embroidery stitches.

If you are interested in getting a custom letter of your own (you get to pick the letter, fabric, thread color, and hoop color!), check them out in my shop!

Tuesday, February 10, 2009

Tool Tuesday: Rotary Cutter

It seems that I am loving my sewing tools again this week. I promise, I have plenty of other tools -- I've just been doing a lot of sewing lately, that's all!

This week my must-have tool is the nifty rotary cutter. If you cut a lot of straight lines, squares, or triangles, then you need this tool! I really don't remember my life before it. Oh wait, yes I do -- tediously measuring and cutting fabric. Well, no more for me. Many of the projects I do incorporate cutting straight lines, and it really was a big pain before. I remember measuring, marking with a disappearing ink pen, using a ruler to draw lines, slow cutting, blah blah blah. Those days are long gone. Now I have this handy Fiskers rotary cutter:
I am very loyal to my Gingher scissors, but when it comes to straight lines, I must use my rotary cutter. You can even replace the blade when it gets dull (which is about every month or two for me, but I cut a whole-lots-o-fabric). It is time to get a new blade when you start having fabric that doesn't cut all the way or you are having to apply too much pressure. **By the Way** Applying too much pressure = not a good idea (I'm lucky I only nicked a fingernail to learn this lesson, I have a friend in high school who had to have a few stitches, yikes!!!). So, when you get a rotary cutter, please make sure to replace the blade when needed!

*Sigh* I do love my rotary cutter... Almost as much as my thread nippers! Its going to be hard to find another tool next week that I love as much as them, but I will try!

P.S. Don't forget to check out Monday's post to enter the thumbtacks giveaway!

P.P.S. I didn't find my battery charger for my camera yet... but I did get a new camera!!! Thanks Dad! Please excuse my photos for a while, I'm still trying to figure out how to use this new guy -- Things I used to photograph in regular mode now need to be photographed in macro, or at least I think that is why the rotary cutter was fuzzy the first 57 times I photographed it! I'm still reading the manual to learn how to use all the functions! At least it is still the same brand (Canon) so some of the functions are the same as my dead-battery-no-charger-camera.

Monday, February 9, 2009

Giveaway: Two Sets of Thumbtacks!

It's Monday... Which means it is time for another giveaway! This week you can win two six-packs of thumbtacks! Here are some examples:


How to Enter: Leave a comment by Friday, February 13th at 9pm. In your comment, let me know which two sets of thumbtacks you like best from this selection in my shop. (You don't just have to pick from the three above -- I have over 80 fabric selections! Make sure to click on the link to see them all.) On Friday evening, I will use a random number generator to choose the winner. Good Luck! :)

Sunday, February 8, 2009

Confession: Jelly Beans

When I was a kid, I hated jellybeans -- those big, pastel jellybeans you got in your Easter basket every year. Ick, ick, ick. They had a really weird texture and the flavors weren't great either.

However, about a month ago I threw a baby shower for a friend who is having a boy. I searched out as many blue candies as I could find, and I bought two kinds of Jelly Belly jellybeans. One kind was sour grape -- a grey-purple-blue color. I ate one, and I was hooked! Jelly Bellies are completely different than those huge pastel jellybeans of my childhood. They have bold, juicy flavors and a smoother texture. Yum Yum!

*Reaches for another handful...*

Check back tomorrow for another weekly giveaway!

Collecting: Mini Art Buttons

I just love some of the work by the artists on Etsy -- But I really don't have the wall space to fit all of their work! I do collect some ACEOs, but these mini art buttons are also a great way to collect art by these artists. I want them all!First - some bird buttons. I love this vibrant, detailed art by BirdNerd.
More birds! Clean and modern with wonderful contrasting colors. A surprise selection of 4!
Birdy Badges - Set of four 1 inch buttons by TheIntuitiveGarden

I just had to have these birds! I love her collage work using fabrics, papers, maps, and colored pencil.
(I also bought her coloring pages!)
Mini Art Buttons - Set of 3 by annarubyking

Whimsical drawings by one of my favorites.
Ashley G Button Pack by ashley g

I just adore Ali J's work -- She isn't on Etsy anymore, but I tracked her down!
Into The Night - 1" badge by Ali J.

Eight pins in their own pouch, by the best-seller The Black Apple.
Simple Things Pin Pack by theblackapple

A surprise selection of buttons featuring her sweet dark-haired girls.
Pack of 6 Gorguss Buttons by gorguss

I just discovered this artist, and I love her work! And these sweet pins aren't prints -- they are the real thing!
The Three Sisters - One of a kind handpainted illustration badge set of 3 by peachpatrol

Nut and Bee's illustrations are just so cute, I can hardly stand it!!! I need them all, not just four!
Four 1-inch Buttons of your choice by nutandbee