Tuesday, February 10, 2009

Tool Tuesday: Rotary Cutter

It seems that I am loving my sewing tools again this week. I promise, I have plenty of other tools -- I've just been doing a lot of sewing lately, that's all!

This week my must-have tool is the nifty rotary cutter. If you cut a lot of straight lines, squares, or triangles, then you need this tool! I really don't remember my life before it. Oh wait, yes I do -- tediously measuring and cutting fabric. Well, no more for me. Many of the projects I do incorporate cutting straight lines, and it really was a big pain before. I remember measuring, marking with a disappearing ink pen, using a ruler to draw lines, slow cutting, blah blah blah. Those days are long gone. Now I have this handy Fiskers rotary cutter:
I am very loyal to my Gingher scissors, but when it comes to straight lines, I must use my rotary cutter. You can even replace the blade when it gets dull (which is about every month or two for me, but I cut a whole-lots-o-fabric). It is time to get a new blade when you start having fabric that doesn't cut all the way or you are having to apply too much pressure. **By the Way** Applying too much pressure = not a good idea (I'm lucky I only nicked a fingernail to learn this lesson, I have a friend in high school who had to have a few stitches, yikes!!!). So, when you get a rotary cutter, please make sure to replace the blade when needed!

*Sigh* I do love my rotary cutter... Almost as much as my thread nippers! Its going to be hard to find another tool next week that I love as much as them, but I will try!

P.S. Don't forget to check out Monday's post to enter the thumbtacks giveaway!

P.P.S. I didn't find my battery charger for my camera yet... but I did get a new camera!!! Thanks Dad! Please excuse my photos for a while, I'm still trying to figure out how to use this new guy -- Things I used to photograph in regular mode now need to be photographed in macro, or at least I think that is why the rotary cutter was fuzzy the first 57 times I photographed it! I'm still reading the manual to learn how to use all the functions! At least it is still the same brand (Canon) so some of the functions are the same as my dead-battery-no-charger-camera.

Monday, February 9, 2009

Giveaway: Two Sets of Thumbtacks!

It's Monday... Which means it is time for another giveaway! This week you can win two six-packs of thumbtacks! Here are some examples:


How to Enter: Leave a comment by Friday, February 13th at 9pm. In your comment, let me know which two sets of thumbtacks you like best from this selection in my shop. (You don't just have to pick from the three above -- I have over 80 fabric selections! Make sure to click on the link to see them all.) On Friday evening, I will use a random number generator to choose the winner. Good Luck! :)

Sunday, February 8, 2009

Confession: Jelly Beans

When I was a kid, I hated jellybeans -- those big, pastel jellybeans you got in your Easter basket every year. Ick, ick, ick. They had a really weird texture and the flavors weren't great either.

However, about a month ago I threw a baby shower for a friend who is having a boy. I searched out as many blue candies as I could find, and I bought two kinds of Jelly Belly jellybeans. One kind was sour grape -- a grey-purple-blue color. I ate one, and I was hooked! Jelly Bellies are completely different than those huge pastel jellybeans of my childhood. They have bold, juicy flavors and a smoother texture. Yum Yum!

*Reaches for another handful...*

Check back tomorrow for another weekly giveaway!

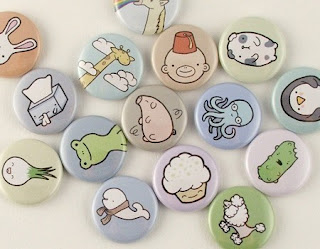
Collecting: Mini Art Buttons

I just love some of the work by the artists on Etsy -- But I really don't have the wall space to fit all of their work! I do collect some ACEOs, but these mini art buttons are also a great way to collect art by these artists. I want them all!First - some bird buttons. I love this vibrant, detailed art by BirdNerd.
More birds! Clean and modern with wonderful contrasting colors. A surprise selection of 4!
Birdy Badges - Set of four 1 inch buttons by TheIntuitiveGarden

I just had to have these birds! I love her collage work using fabrics, papers, maps, and colored pencil.
(I also bought her coloring pages!)
Mini Art Buttons - Set of 3 by annarubyking

Whimsical drawings by one of my favorites.
Ashley G Button Pack by ashley g

I just adore Ali J's work -- She isn't on Etsy anymore, but I tracked her down!
Into The Night - 1" badge by Ali J.

Eight pins in their own pouch, by the best-seller The Black Apple.
Simple Things Pin Pack by theblackapple

A surprise selection of buttons featuring her sweet dark-haired girls.
Pack of 6 Gorguss Buttons by gorguss

I just discovered this artist, and I love her work! And these sweet pins aren't prints -- they are the real thing!
The Three Sisters - One of a kind handpainted illustration badge set of 3 by peachpatrol

Nut and Bee's illustrations are just so cute, I can hardly stand it!!! I need them all, not just four!
Four 1-inch Buttons of your choice by nutandbee


Saturday, February 7, 2009

On My Craft Table: Scarves, Bunting, and a Mystery!

Saturdays are when I usually get a lot of crafting done -- both for my shop, for friends, and for myself. Here's whats on my craft table today:

These are bunting flags that will be made into bunting banners for my shop. They just need to be sewn into the seam binding -- I hope to have them done by next weekend. There are a whole lot of fun new fabrics in this basket of flags! Cherries, cars, moons, some Amy Butler...

I have also been working on some scarves. Some are skinnier, but some are wider like this one. It is made from Heather Bailey fabrics -- they are really bright and bold! I love the ruffle on the end, which was a spur-of-the-moment idea. It is backed with super-soft minky fabric. Look for these in my shop soon too!


Here is a close-up of the scarf -- It isn't quite done yet, it needs to be top stitched around the edge.


And last, a mystery! This is a new idea I had, and it is quite different than anything in my shop right now. I won't give it away yet, but it will be available for custom order in my shop. I am working on samples right now for the photos.

And the winner is...


The sixth person to post, which is Leigh! Congratulations! I will be contacting you via email for your address so I can ship it out to you!

I have more pencil cups available in my shop, if you didn't win and would like to buy one. I'll be uploading more styles throughout the week (once I find my camera battery charger!!)

Check back Monday for another giveaway!

Thursday, February 5, 2009

Creative Organizing: Magazines

After crafting and reading, organizing is my third favorite hobby. Yes, hobby -- I will reorganize things that are already organized, and I am constantly searching for the "best" way to organize certain things. Sometimes, I will use an ordinary organizer (today, magazine holders) and add some type of decorative or creative flair to it. Other times I will use something in a new way, and there are even times when I make my own organizer!

Today, we'll start with something ordinary: Magazine holders. They come in all sorts of styles (metal, wood, plastic), but I never could find ones that matched my decor and were affordable. So, I used inexpensive cardboard magazine holders from Ikea and wrapping paper to make my own!


In order to make these, you need:
- cardboard magazine holders from Ikea (they come flat fold, which makes this very simple)
- spray adhesive
- scissors
- wrapping paper (obviously pick a roll or two that matches your decor)


First, lay one of the flat magazine holders on the wrapping paper. The paper should be wide enough to go around the holder, so you need to cut a piece slightly taller than the holder.

Next, (do this outside or on scrap paper) spray the entire outside of the flat magazine holder with spray adhesive (both flattened sides).

Wrap the wrapping paper around the magazine holder. There will be an area that overlaps, you can cut this off or fold it and tuck it under (that is what I did).

Once the spray adhesive is dry, use your scissors to trim the wrapping paper around the edges of the magazine holder. This is easier to do if you "unflatten" the holder (you won't be able to fully assemble the bottom until you trim off the extra wrapping paper). Once it is trimmed, assemble the bottom of the holder by tucking in the flaps. Tada!

I would love to post step-by-step photos, but I am still dealing with limited battery power on my camera and a lost charger. If you have questions, please do ask and I will try to help!